Ubuntu Increase Partition Size
After increasing the Disk size from Proxmox, boot the vm from gparted live disk:

You will see the unallocated added space.
Select the partition you want to add the extra space to, then click on Partition and select Resize/Move. Here you will be able to simply drag the partition to increment its size.
Click Resize/Move to queue the changes.

Click the Green Check mark, then click Apply to apply the changes.
Now again, but this time select the lvm2 partition, the one inside the main partition and again click Partition then Resize/Move
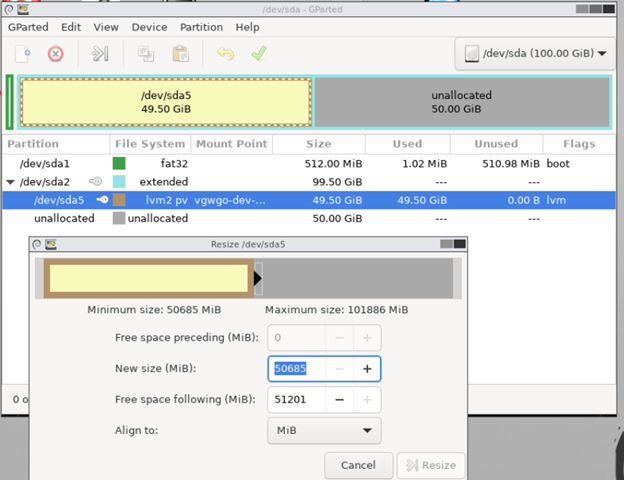
Drag the slider to the right to enlarge the partition, then click Resize.
Again click the Green check mark, and then click Apply.
After that, click the Gparted menu and select Quit, then click the exit button and restart to Ubuntu.
Back on the command line, lets double check the current size of the Volume Group:
sudo vgdisplay
Take note of the VG Name value, this is the name of the Volume Group.
Now we need to increase the Volume Group and the Logical Volume
sudo lvextend -l +100%FREE /volume/name
Now we need to resize the Volume to take advantage of the new space.
sudo resize2fs /volume/path
After that, you can now check the size of your / filesystem and will see that it has increased.
sudo df -h
Thats it,
Comments
So empty here ... leave a comment!